How to Shoot Yoga Photography (From Settings to Location)
$ 11.99
5(661)In stock
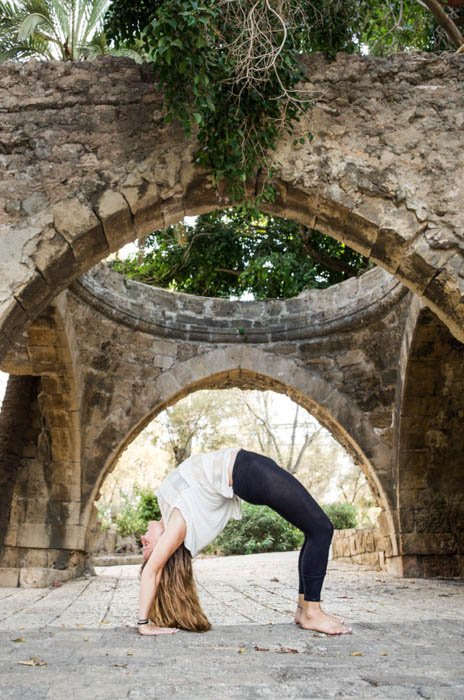
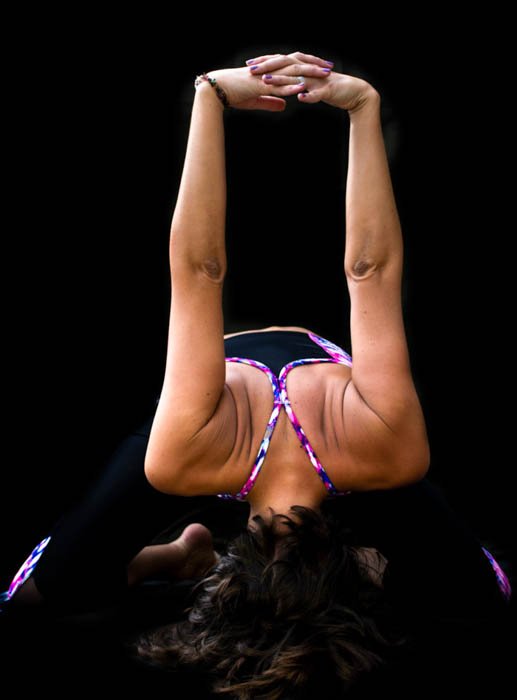
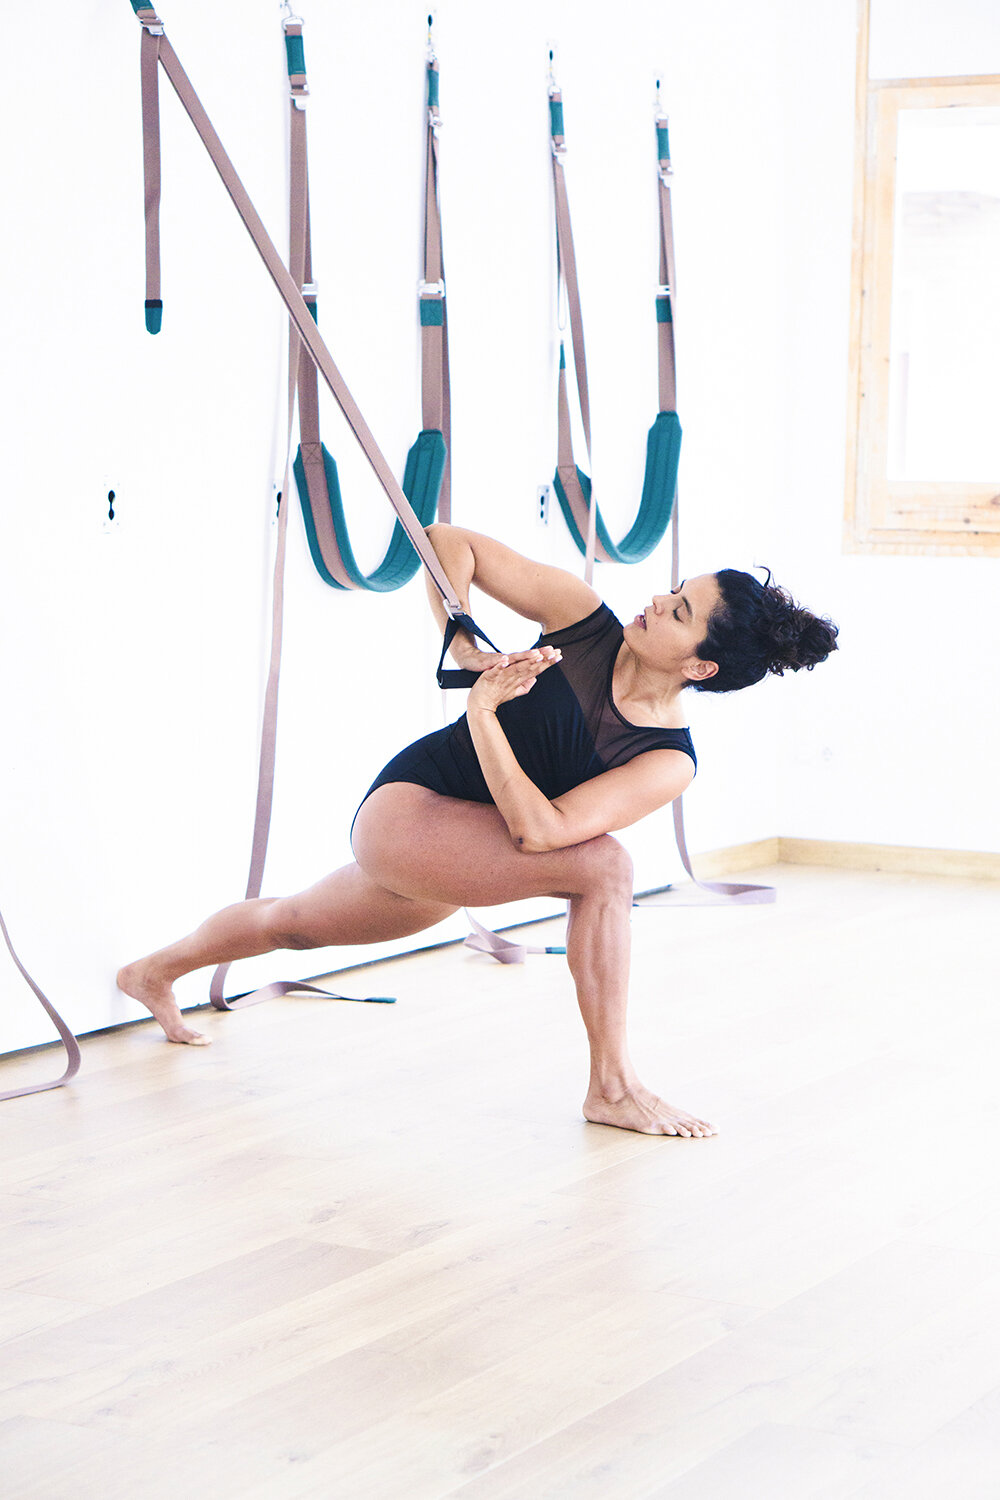
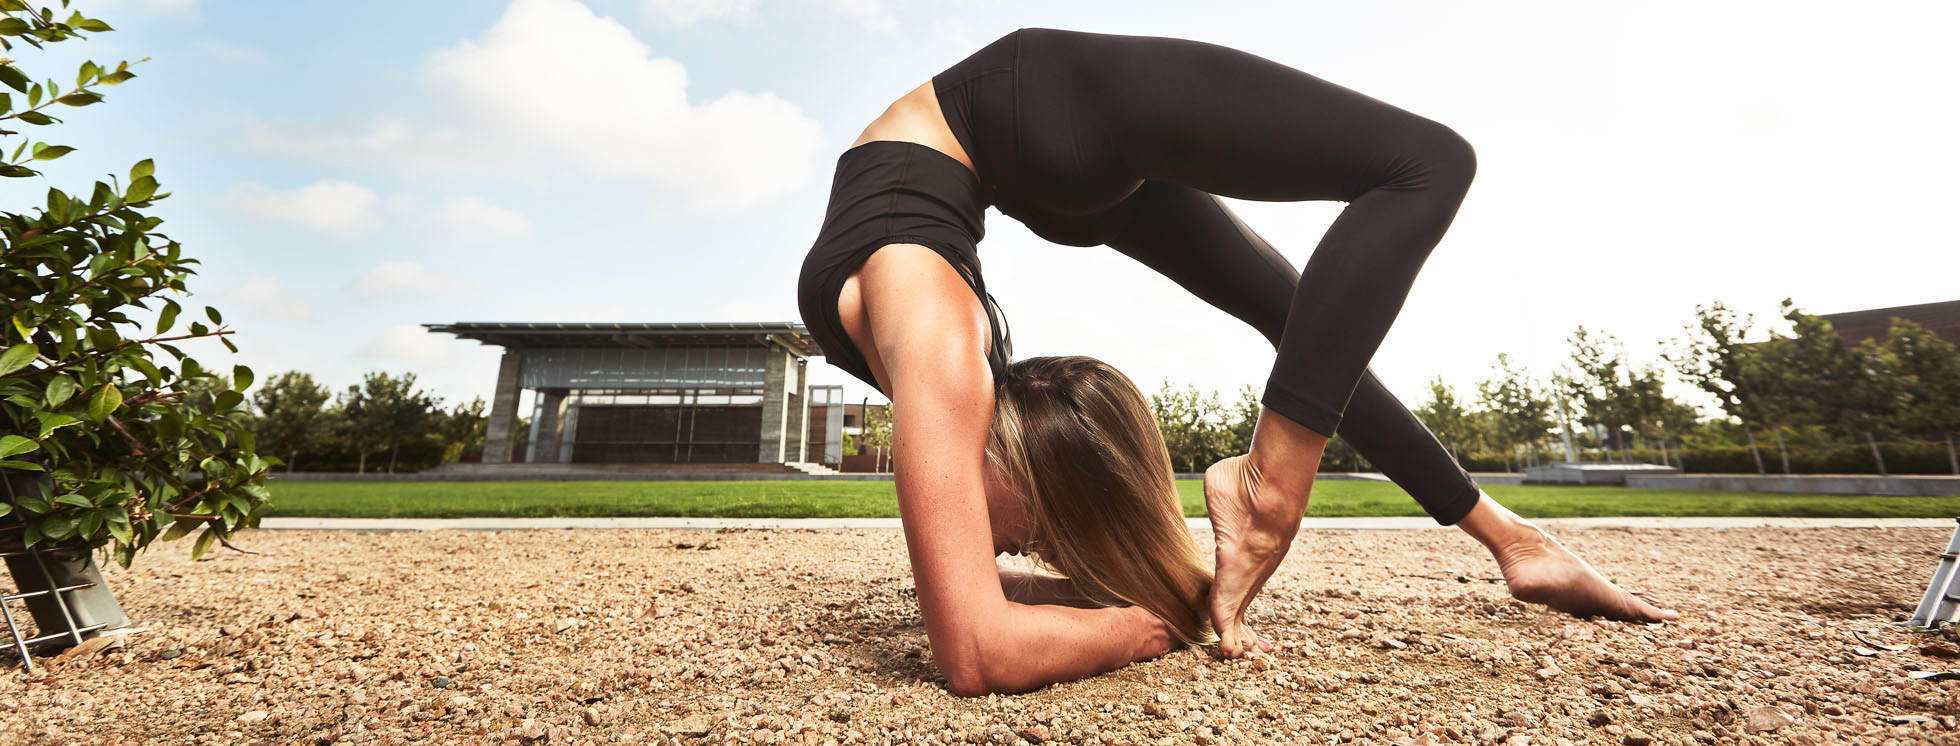
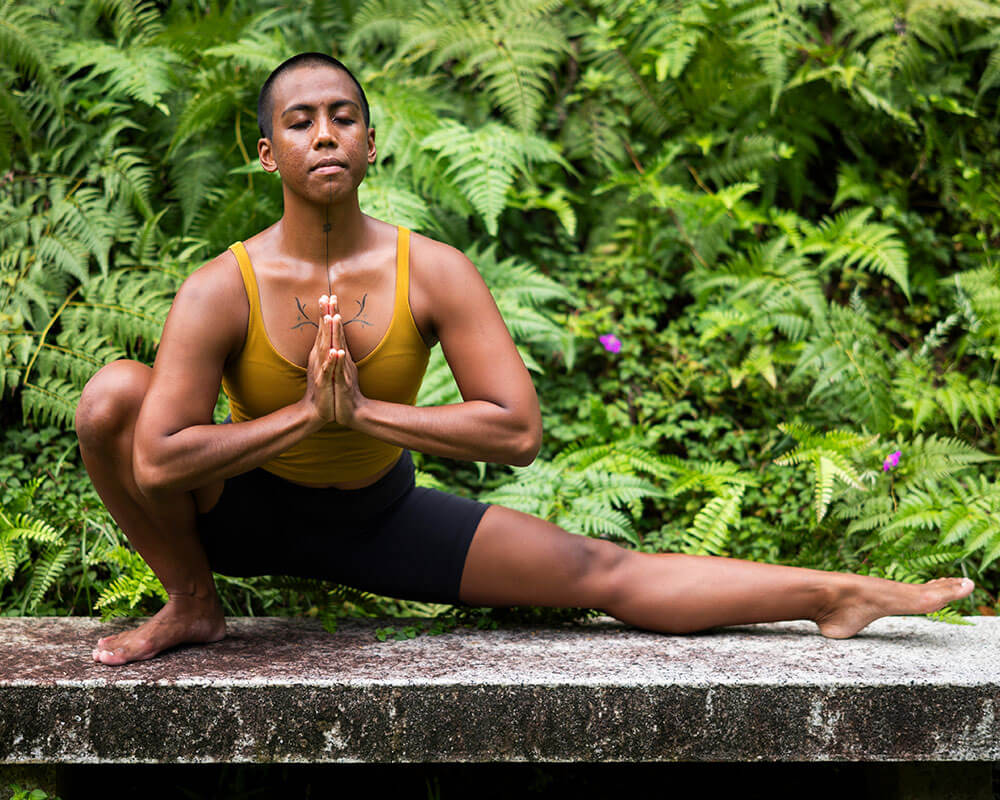
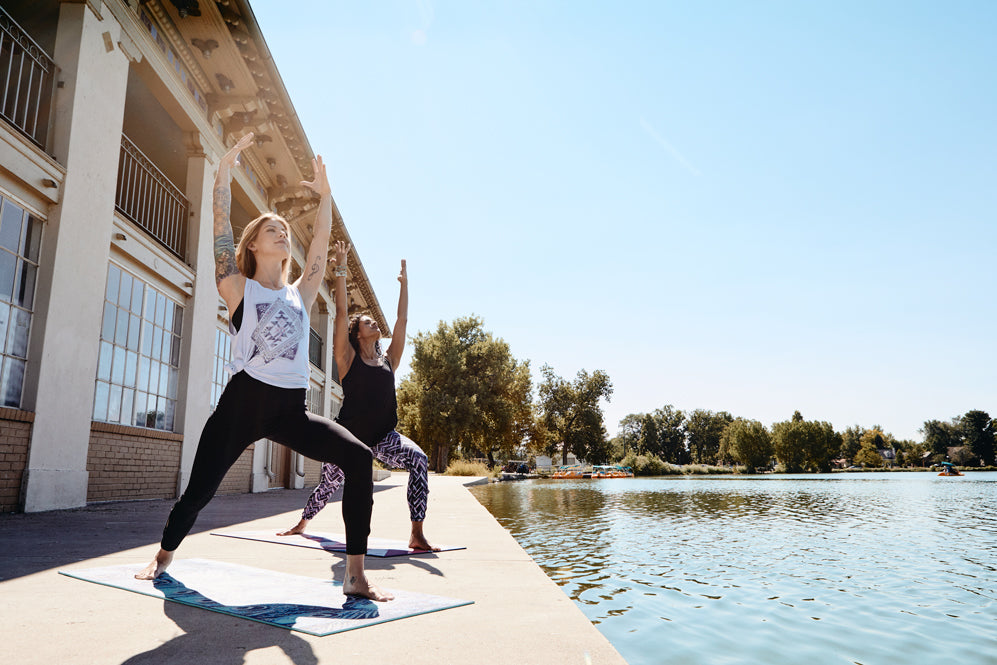
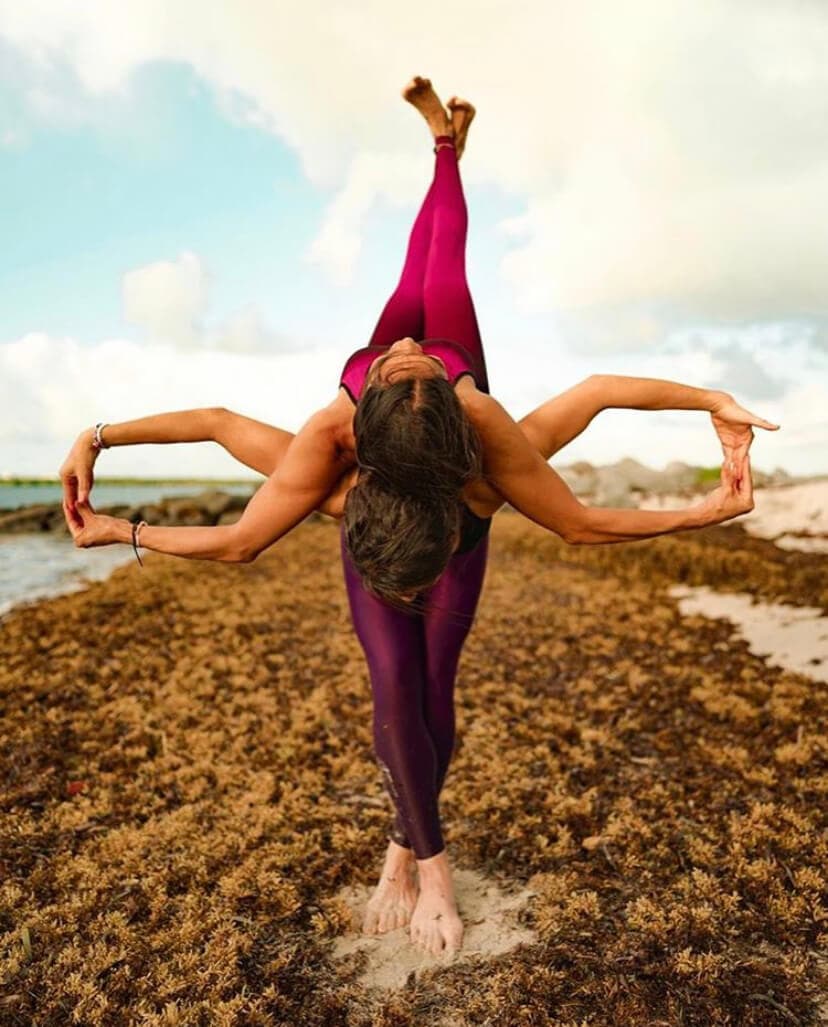
People all over the world practice yoga. Social media is full of pictures of yoginis twisting their bodies in various poses (asanas) and pushing the limits of their physical endurance. As a yogi myself, I found that yoga photography is an excellent way to show the beauty of this ancient practice. The best known type of yoga photography is when a yogi does a sequence of poses and is photographed throughout. For this reason, yoga photography has a lot in common with portrait photography. But there are some differences. If you're looking to get better at taking pictures of athletes, want to learn a trick or two for your Instagram profile, or just want to try a fun new type of photography, this post will take you through everything you need to know for better yoga photography, from settings to composition to location. Yoga Photography Equipment A camera that will allow you to change aperture, shutter speed and ISO Neutral Density filter (optional) Backgrounds (optional) Tripod (optional) A collection of yoga poses (in photos or a list of names, you can get a book or make the collection yourself) Cleaning materials and a towel for the yoga mat (I find a spray of water with vinegar the most useful) Do Your Research Before the Yoga Photo Session The more you know about yoga, the better you can prepare for the photo session. These days there are a lot of available resources: video tutorials on , online courses, books - you can even try a yoga class yourself to better understand your yogi model. Research will also help you build up your yoga pose collection. Camera Settings Your camera settings will vary depending on the yoga pose. For still poses, your settings can be the same as those used for a portrait. Your model won't be moving so you can use a shutter speed between 1/250 and 1/125 of a second. If you're not using a tripod and are holding the camera in your hand, don't go lower than that. The aperture setting will depend on how blurry you want the background to be. If you want all the photos to be sharp, use a narrow aperture setting, such as f/22. If you want a blurry background to make your subject stand out, you can use a wide aperture (f/2.2 for example). Keep in mind that if your subject moves, you might get some body parts blurry too. I find that an in-between value, such as f/8, is a good option. It will give you some separation between your subject and the background, and at the same time keep your subject sharp. I like setting the ISO as low as I can but I will always take the aperture and shutter speed values into account and set them first. If I need to compromise on one of the three, it will be the ISO. For moving poses, you will need to use settings suitable for sports photography. This means faster shutter speeds in order to avoid blurring the model. As for aperture, I wouldn't recommend using a wide aperture setting because the model can easily go out of focus. An f/8 will do the job in this case. The faster shutter speeds and narrow aperture might require you to increase the ISO values in order to get a well exposed image. Keep an eye out for that and don't be afraid to experiment with different settings until you get it right. Focus To focus on your subject faster, I recommend to use the auto-focus. For still poses, I use what Canon calls "One Shot" mode and Nikon "AF-S". It is probably the most common one. When you press the shutter bottom halfway, the camera focuses one time and it holds it until the photo is taken. For moving poses, I recommend using continuous focus. It is known as AI Servo mode (in Canon cameras) or AF Continuous (in Nikon ones). When you press the shutter speed halfway, the camera will focus on your subject. If you keep the shutter-release button pressed like that, the camera will track the movement of your subject and will continuously refocus to keep it sharp until you take the photo. You will still miss some photos (moving models are hard to catch), but much less than using the One Shot mode. Vary the distance from your model If you want to take advantage of the background, take wide angle shots. This will include a lot of the background and make your model look like they're part of a bigger story. If, on the other hand, you want to focus on your model, you can take medium shots in which they are closer and their body fills up most of the frame.Or you can take close-ups, where the model is even closer and you can create a dramatic effect. Close-ups don't have to be of the face either! These are great for taking photos of details such as mala beads, tattoos or body parts. Hands, feet and cropped backs can turn into a great photo! Experiment with it and have fun. Try Different Camera Angles Camera angles that are different from eye level work well in yoga photography. They are lively, exciting and allow you to emphasize other aspects of the yoga poses. Taking a shot from a low angle will make the yogi look stronger. You can do the opposite and take a photo from a high angle. You will emphasize your model's face, and these photos are usually quite flattering. Yoga Photography is All About Variety Yoga poses can be divided into general groups: standing, sitting, back bending, arm balances, etc. You can build up a great yoga photo session by including a few poses from each group. If you combine poses from different groups with different locations and distances from your model, you will end up with a great variety of photos to choose from. This will also increase your chances of getting that perfect shot. Let Your Models Check the Photos Letting your models see the photos will help them correct their stances and poses. A yogi won't use a photo where they are doing a pose incorrectly. Since they can't see themselves while performing, they will want to see the photos before moving to the next pose. If you practice yoga yourself, try to keep an eye on your model's alignment and guide them while they do the pose. If not, you can ask them to explain what they want to achieve and what you should be looking out for to help them. Pick a Good Location You can practice yoga anywhere, which means you can take yoga photos anywhere, from the yoga studio to the beach or a forest. Nature photos are great because they show the connection of the yogi with the environment and give a feeling of peace and freedom. A lot of yogis like that. However, photos with a contrasting location, like an urban area, add a different dimension to the photo and make it eye-catching. You can even take photos at home! Get Creative with Yoga Photography Artistic yoga photography lets you be more creative. Allow yourself to explore perspectives, compositions and poses. Have some fun! You can experiment and see how different backgrounds change the mood of your photos while the model performs the same pose. You don't even need anything fancy to do this. A big piece of fabric placed behind your model will do the job.You can also play with shutter speed. If you increase it, you can blur the movement in the scene. You can even use a neutral density filter to darken the scene and be able to use an even lower shutter speed. If you do this, you'll want to have a tripod and your model has to be very still, otherwise they will turn out blurry too. On the other hand, blurring your model can also be something to try out. Keep the Mat and the Background as Clean as Possible The yoga mat is an integral part of many yoga photo sessions. Keeping the mat clean will make your life easier later in photo editing. As yogis often pose barefoot, the mat will accumulate markings, smudges and footprints along the day. I usually take a spray bottle of water and vinegar and a towel with me for this. I make sure to clean the mat from time to time during the shoot depending on how dirty it gets. Your model will appreciate this too and it will give them the sense that they are working with a professional. Beside cleaning the mat, you should pay attention and take out trash and unwanted objects from the frame, especially if you are shooting in an urban setting. This will save you time during post processing. Conclusion Yoga photo sessions are both challenging and fun. If you take photos of still poses, shoot as if you are taking a portrait. For moving poses, shoot as in sports photography. Try to combine different poses, camera angles and locations and you will obtain a great photo collection. Keep your model safe (don't ask to pose in places where they could get injured) and enjoy being creative! I would like to thank the yoginis in this article: @reinodenita, @inulalove and @shamanic.mermaid. People all over the world practice yoga. Social media is full of pictures of yoginis twisting their bodies in various poses (asanas) and pushing the…
Fine Art Prints Yoga Photography Splits Turks&Caicos — Amy Goalen